
We will assume that:
- You are using Windows Server 2016 or above or, Windows 10 x64 or above for your satisfactory server, and you have enough system resources to host a satisfactory server.
- You have the software dependencies for a satisfactory server like: The Redis files from Windows and the Windows DirectX End User runtime files installed.
- You can follow this guide from the beggining if you like, asumming you don’t have anything installed yet, or you can go ahead and follow the official guide. If you in the other hand have a satisfactory server already running or installed. You can go ahead and scroll down to the second part of the Tuto.
- You are able to access your server (or dedicated machine) over lan (if you already have satisfactory server).
- You know your satisfactorys server machine Local IP Address, you know: cmd -> ipconfig. Etc…
- You know how to modify a bat file using any text file editor «notepad» for example (bat file is used to launch your satisfactory server).
- You have connected/linked your computer to playit.gg servers and are able to access your tunnels with the playit official app.
- You’ve already tested, or are hosting a server for a simple game, like terraria/tshock or factorio (and you know that your playit stuff is working).
Disclaimers:
- If you mess up your games config, not my fault.
- If the electricity goes down in your area, not my fault.
- If your computer suddently explodes, not my fault.
- If you mess up your windows machine, not my fault.
- If the tuto tells you that you set your computer on fire, a little my fault.
- If the tuto annoys you because of grammar faults, a little my fault, sry not native english speaker, lol.
Issues I faced or know issues:
Sometimes the server won’t show in your favorites list (check final steps of this tuto so you know what to do).
The Tutorial, the basics or, the First Part:
Alright first of all very briefly we will install Satisfactory:
First, you download the official steamcmd.exe utility, you can download it here download the windows version.
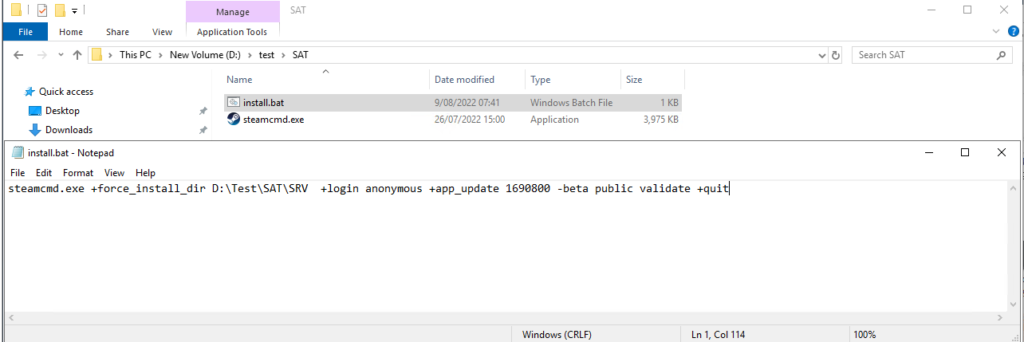
Put it in a folder, then, in that very same folder you must create an empty text file and change its extension to «install.bat» then, go ahead right click it and edit it (the default app is notepad), inside you must put the following:
steamcmd.exe +force_install_dir D:\Test\SAT\SRV +login anonymous +app_update 1690800 -beta public validate +quit
In this particular tuto I am using as the installation directory my drive D:\ and the mentioned folders .\Test\SAT\SRV which is where satisfactory files will store (you can change it to whatever directory you like). Go ahead and save the changes and close the notepad. You may get a better idea with the picture below:
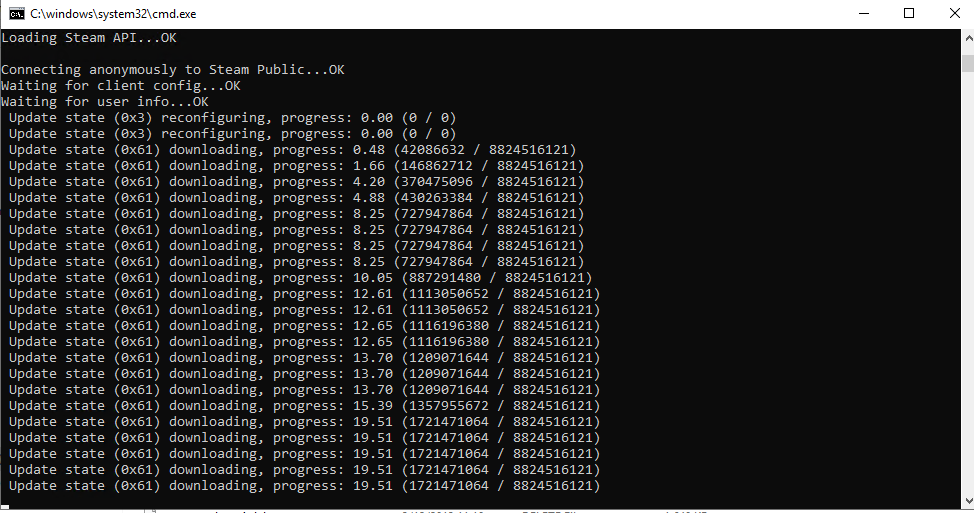
Double click it and it will start download and installing the Satisfactory Server Files.
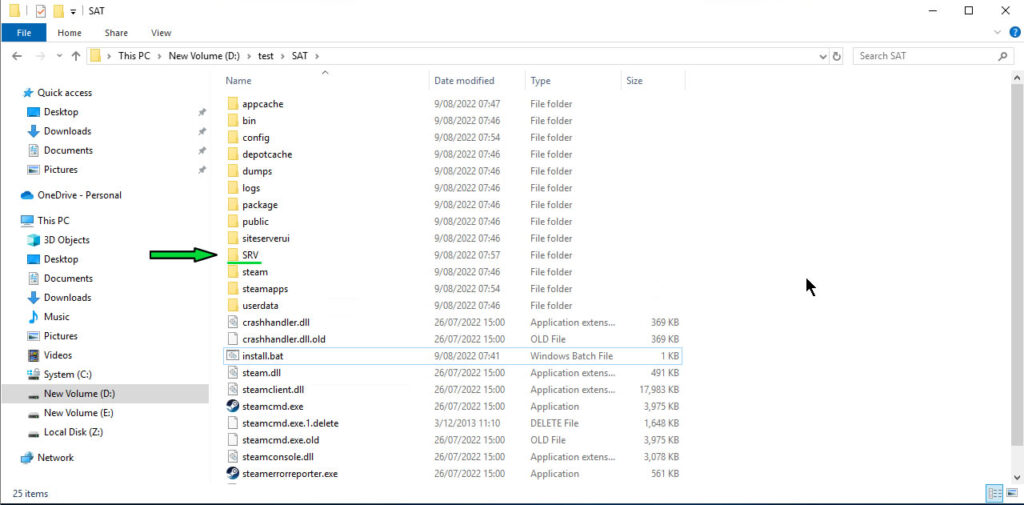
Once finished, you will end up with a lot of stuff in the the folder you were working, ignore them (those are steamcmd dependencies and a lot of crap we don’t need, do not delete them), you can use this install.bat file later in order to upgrade your satisfactory server (when an update is released), now you just need to go to the folder you previously defined, in this case D:\Test\SAT\SRV (which is showed in the picture below).
Inside the «SRV» folder you need to create an empty text file, then change its name and extention to .bat, so you end up with a launcher.bat file, go ahead right click and edit it. Then Copy and Paste the following:
FactoryServer.exe -log -unattended
It should look similar to what its show in the picture below:

Save it and close the notepad.
Double click it and let it load, it should show a console with a lot of text like the picture below:
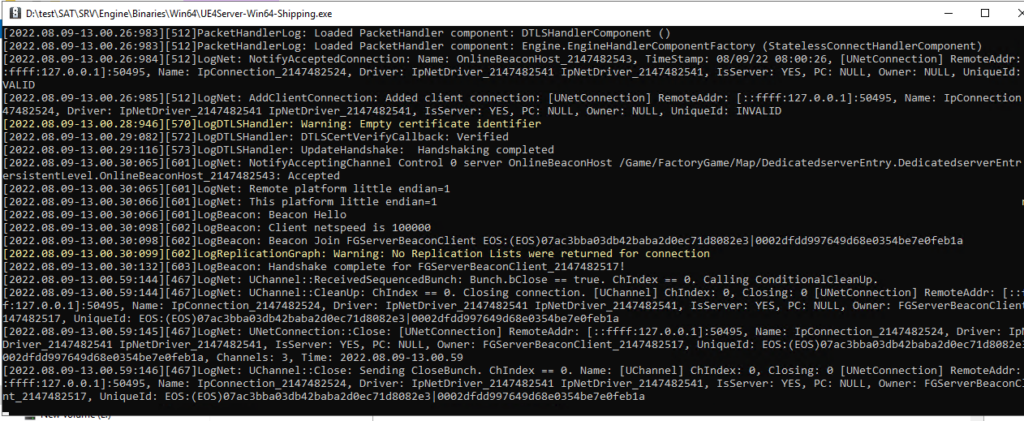
When it stops doing its thing, you can go ahead and launch your Satisfactory Game (in your gaming computer).
At this point we assume that you know your servers local Ip address, in this particular case mine is 192.168.0.49.
So inside the game, in the main menu click on «Server Manager» then «+ Add Server» put your server Ip Address and the default port is 15777 (we haven’t change any of this yet). Click «CONFIRM», check the picture below:
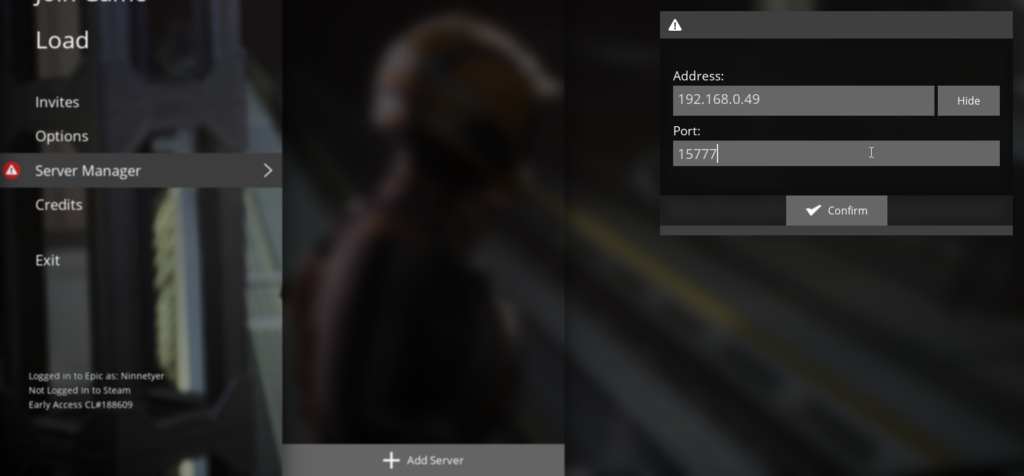
If everything goes right you should end up with something like in the picture below:
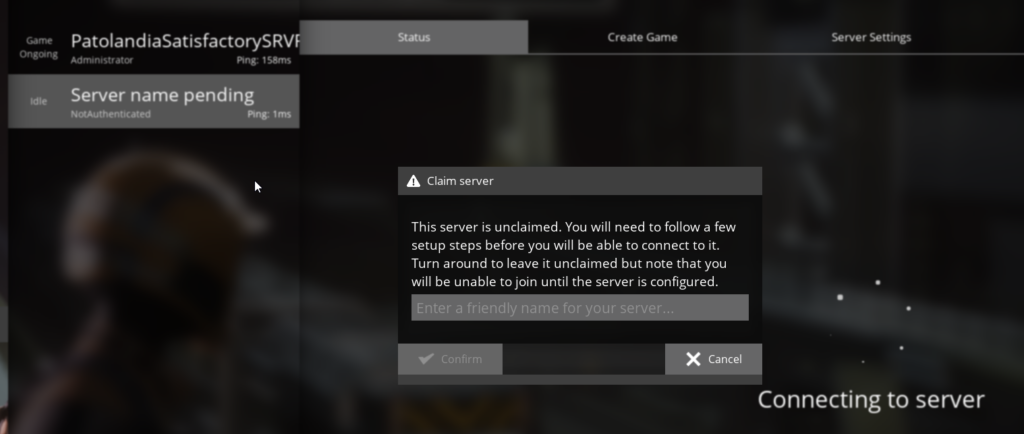
You can claim and name your server BUT in this case I rather click cancel and delete the server, also ignore my other server that is already there, in your case you shouldn’t have anything there yet.
Note: if the server doesn’t show up, then something is preventing your gaming computer from reaching the server, it could be your windows firewall, antivirus firewall, or the windows servers firewall, maybe you’ve put the wrong Server IP ?
~
Second Part of the TUTO:
~
Now assuming that everything is working, we can make your local Satisfactory server into a publicly accessible one.
First close your Satisfactory Server, press Ctrl + C or just close the way you know.
Go to your playit platform login in, and go to the «Tunnels» section and click on «Custom», put your server Ip address in the «local ip» field, in the «local port» field put whatever you like I will put 100 (we will change it later). Click on «SET»
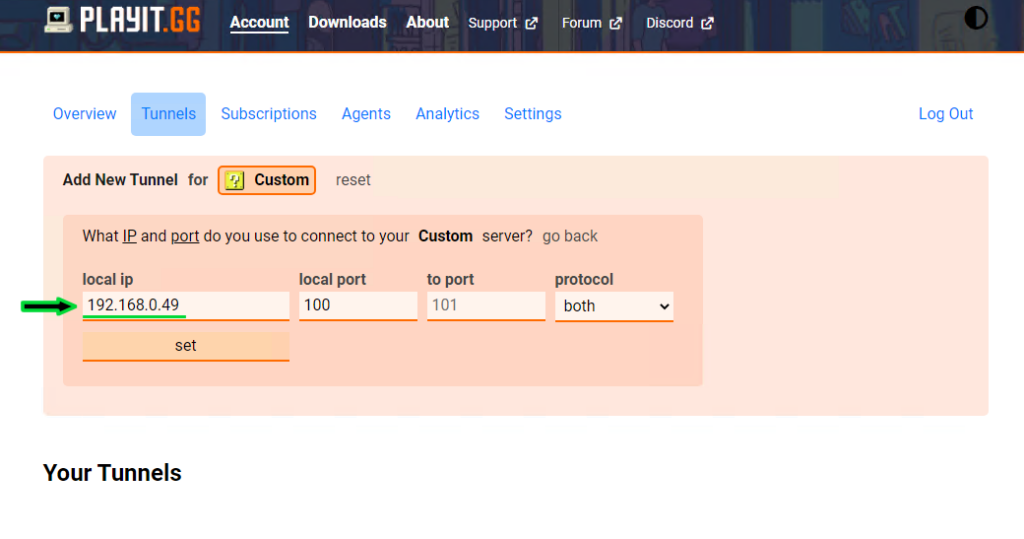
The following will show up, just click «Add Tunnel»
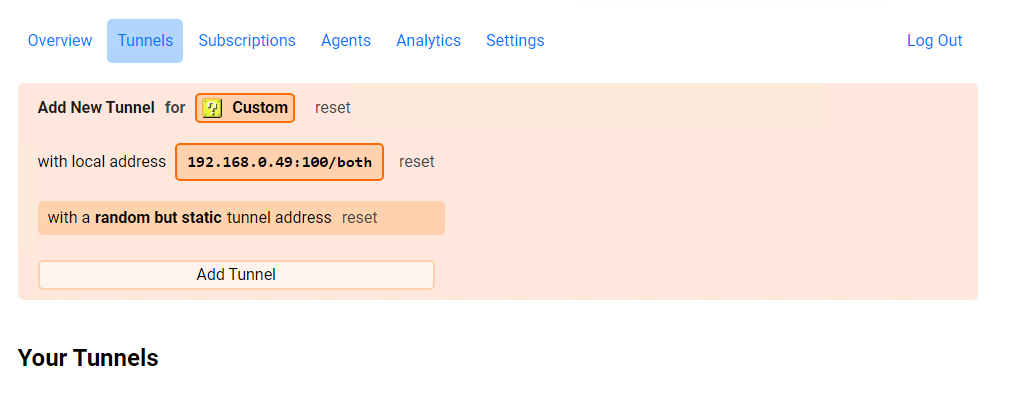
Then you need to edit this tunnel just click on edit

Then you must change the «Local Port» you previously defined for the one that playit randomly gave you, in this case I gave it 100 but playit gave me the port 24696. Also you may name this Tunnel with something you find familiar.
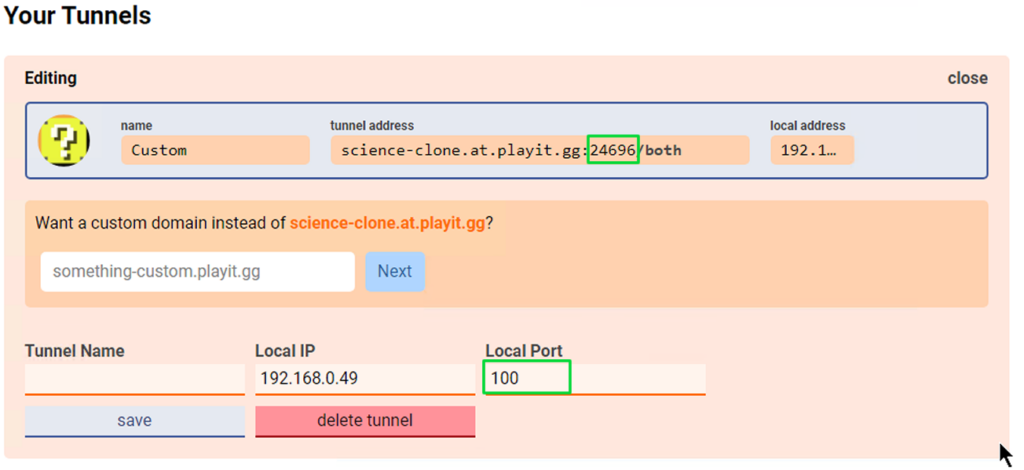
In this case I name the Tunnel «SatisfactoryGamePort» and changed the port 100 into 24696. This will be our Satisfactory Game Port obviously. Click on «SAVE».
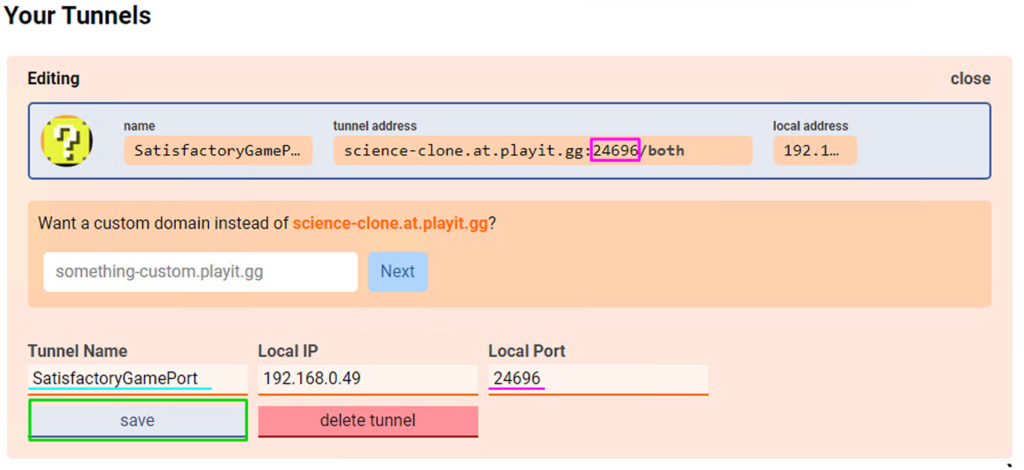
Now, you need to do this steps for the next two extra tunnels, so you end up with three tunnels.
I will show you the two extra tunnels for this particular tuto (satisfactory needs 3 tunnels/ports).
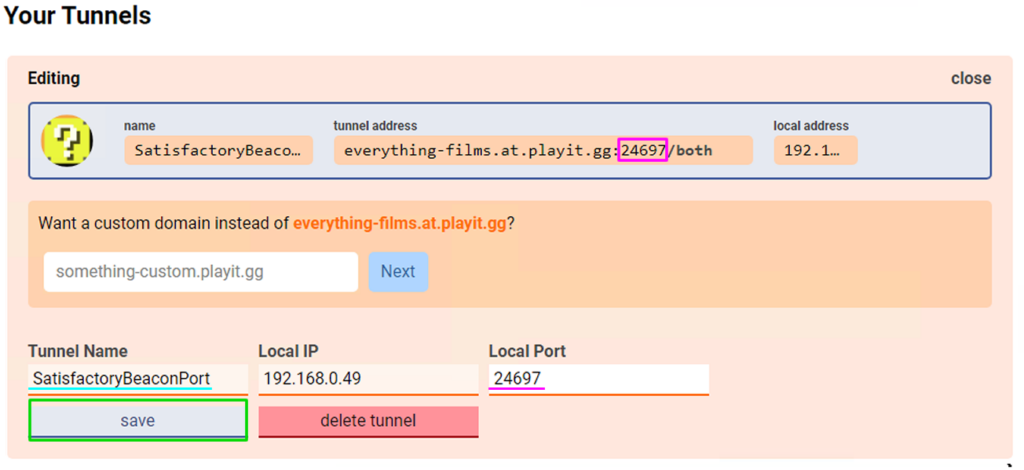
In the picture above we named this tunnel «SatisfactoryBeaconPort» and we got from playit the port 24697 which I’ve replaced in the «Local Port» field. (click save). Do not forget to define your «Local IP» in this case obviously it’s still 192.168.0.49.
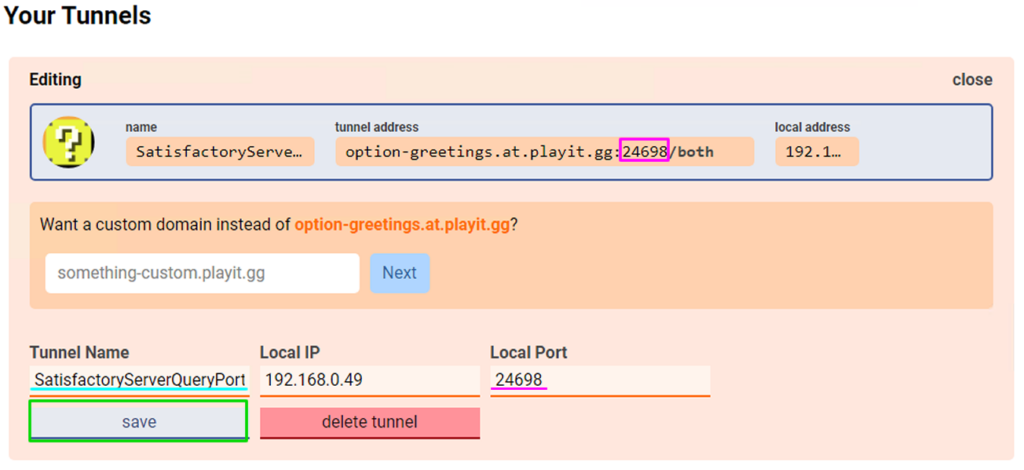
In the picture above we named this tunnel «SatisfactoryServerQueryPort» we got from playit the port 24698 which I’ve replaced in the «Local Port» field. Do not forget to define your «Local IP» in this case obviously it’s still 192.168.0.49.
You will end up with this three Tunnels:
The Satisfactory Game Port, The Beacon Port, and the Query Port.
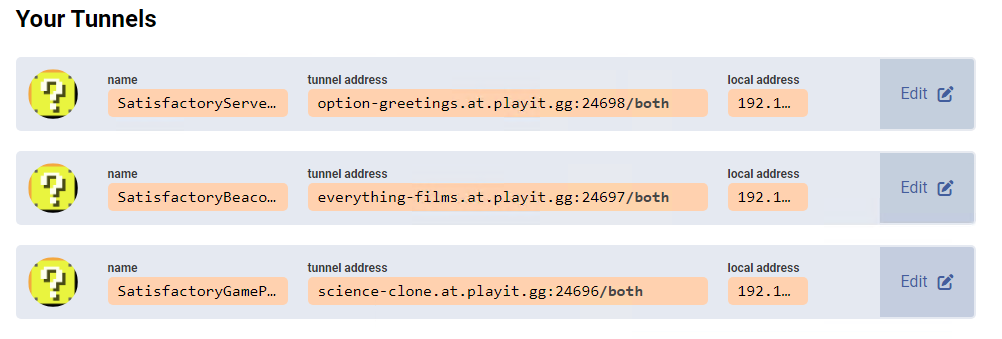
Alright now that we know our playit ports we need to replace them in our satisfactory server installation.

Remember our launcher.bat file?, right click it and edit it. We will add the following into it.
FactoryServer.exe -log -unattended -multihome=192.168.0.49 -ServerQueryPort=24698 -BeaconPort=24697 -Port=24696
Of course you need to replace this port with the ones playit gave you. Also you may add the -multihome parameter to avoid possible issues obviously you need to put your server ip address after the -multihome parameter (ins this case 192.168.0.49).
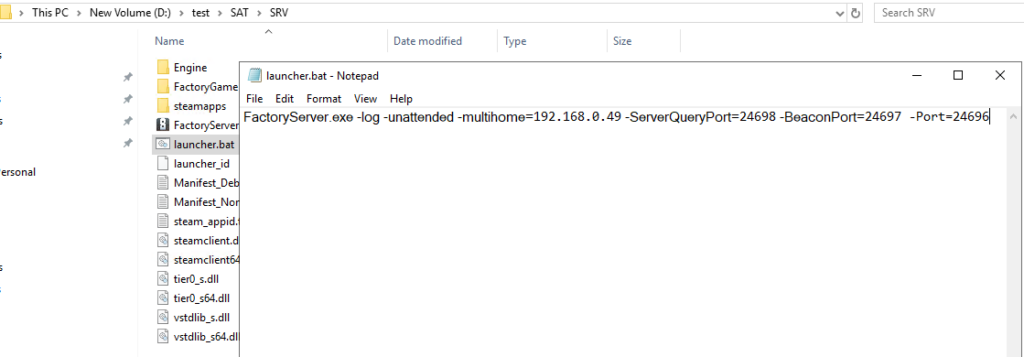
In this particular tuto your file should look similar to the picture above. Save your changes and close the notepad. Then double click the launcher.bat file that we’ve just edited.
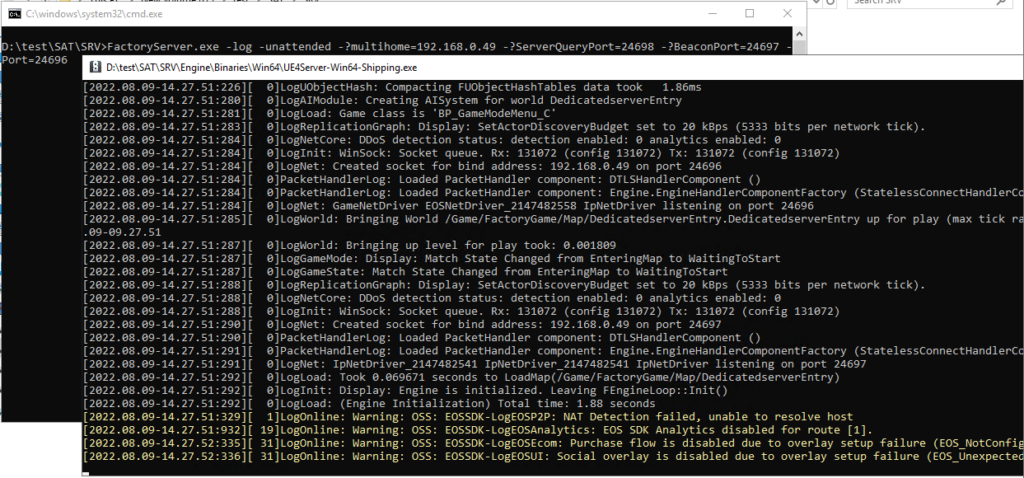
Upon launching it should look similar to the picture below:
Now, in order to access your server we need the «dns name» playit gave you. The one we need is the Tunnel which we named «Query Port» (the last one we created). In this case it’s:
option-greetings.at.playit.gg:24698
Knowing your dns go ahead and launch your satisfactory game once more.
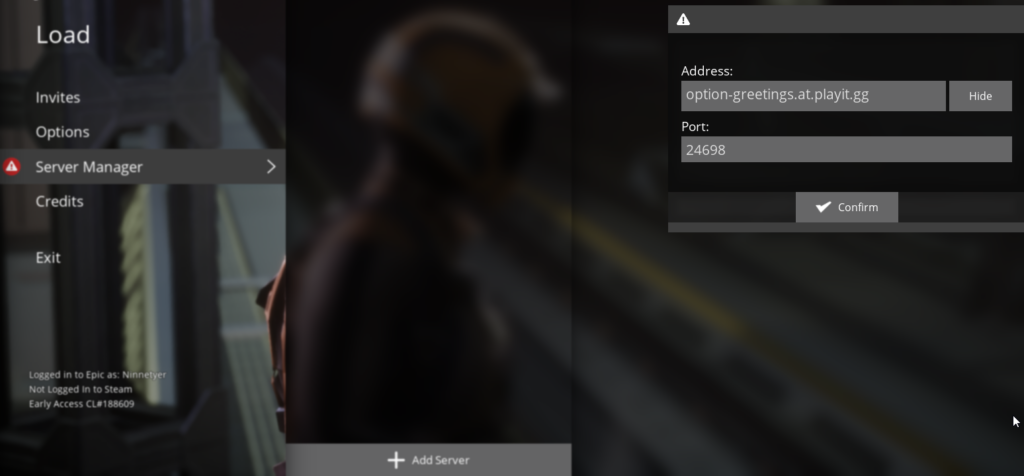
In the main manu go to «Server Manager» then «+Add Server» put in the «Address» field your dns name:
option-greetings.at.playit.gg
and replace the default port provided (15777) for the one we are using (24698). Go ahead and click «CONFIRM».
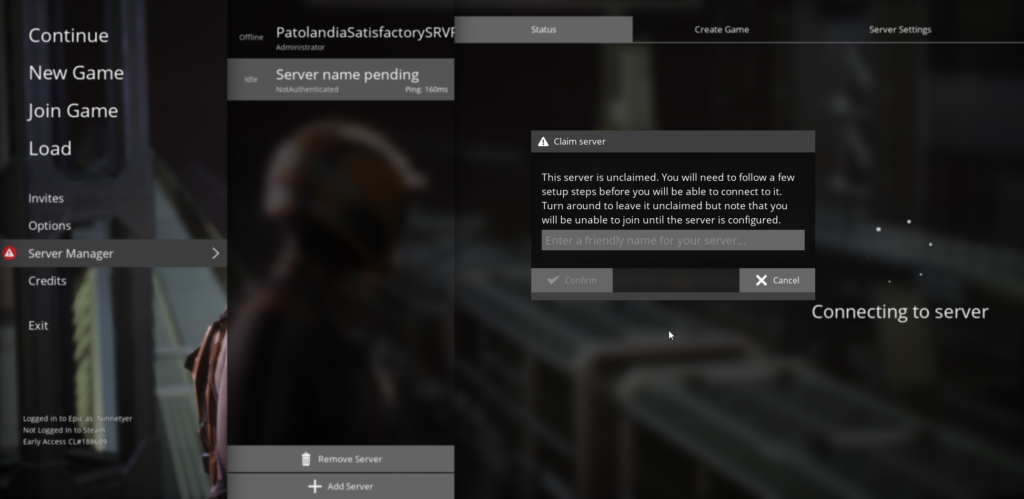
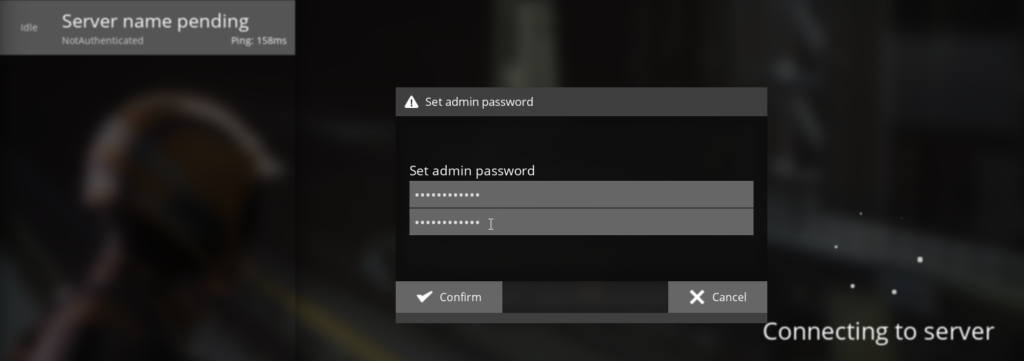
If you didn’t Claim your Server like I suggested at the very firsts steps, you can now go ahead and claim it, define your Servers Name and then an admin password for it.
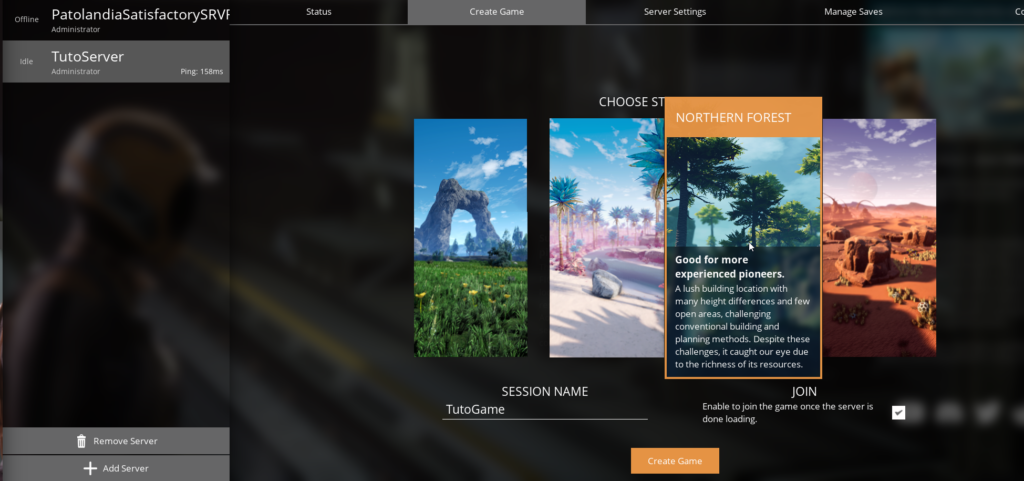
Define your Session Name and Create your Game like the picture below.
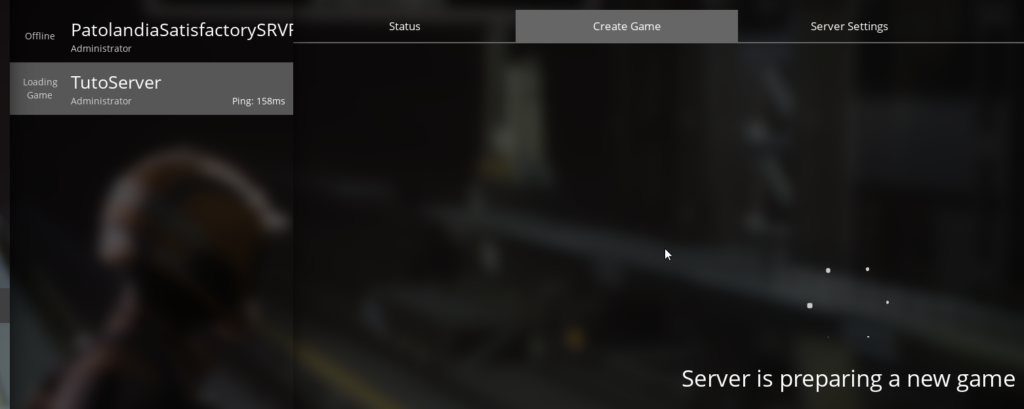
Once finished click on «Status» and the «Join Game»
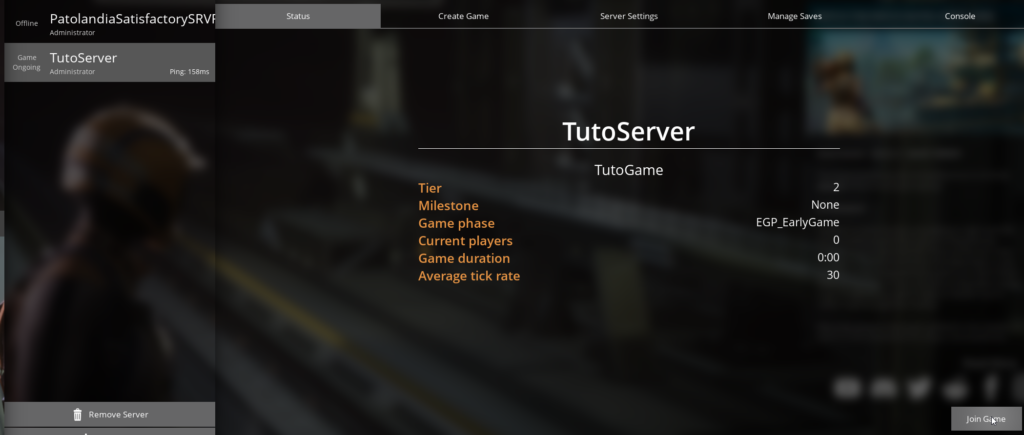
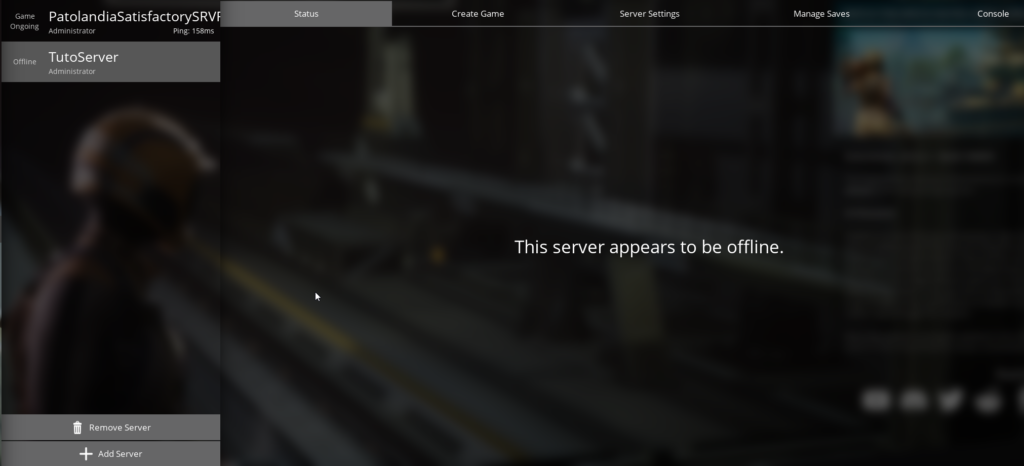
Do Note that sometimes the server may appear as offline (like the picture above) you just press «your keyboard escape button» to go to the main Menu and then click on «Server Manager» again, it should show up again as online. (this is a know issue with play it), if it doesn’t just close your satisfactory game (NOT THE SERVER) and open it up again. This issue shouldn’t affect your gameplay once you have joined the server.
Anyway once you click «Join Game» wait for it to load.
And enjoy your gameplay, share your particular «dns name» and the port playit gave you with your pals or your significant one, so they can join you.
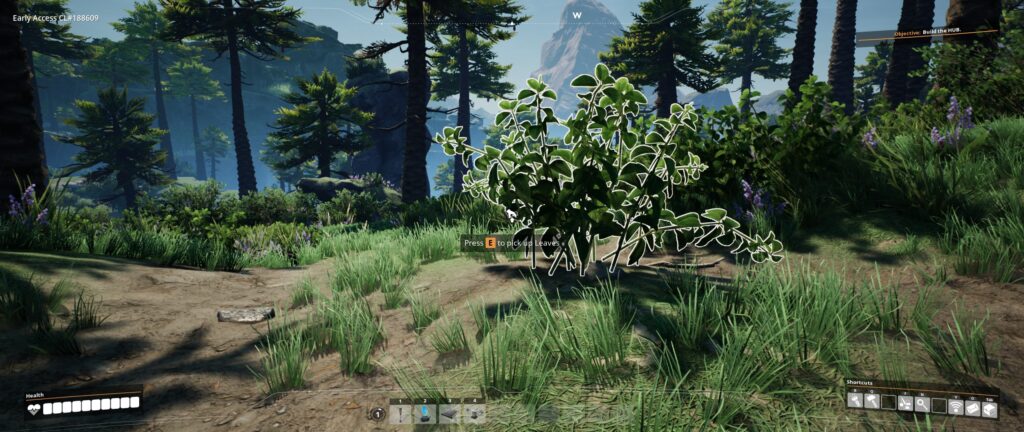
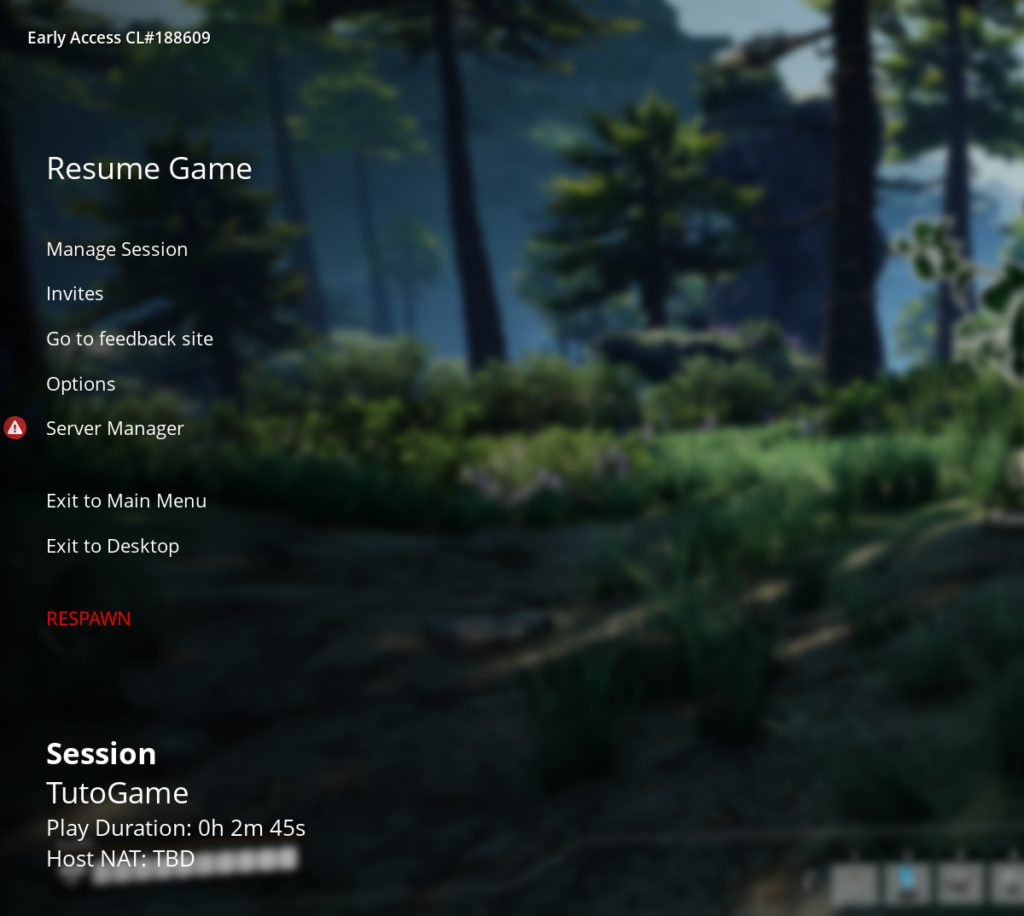
Finally FYI your Session will show as Host NAT: TBD (like the picture below) do not fear, tecnically people are joining trough LAN instead of WAN, thats the magic playit does. I won’t enter in technical details, but you can ignore the NAT thing.
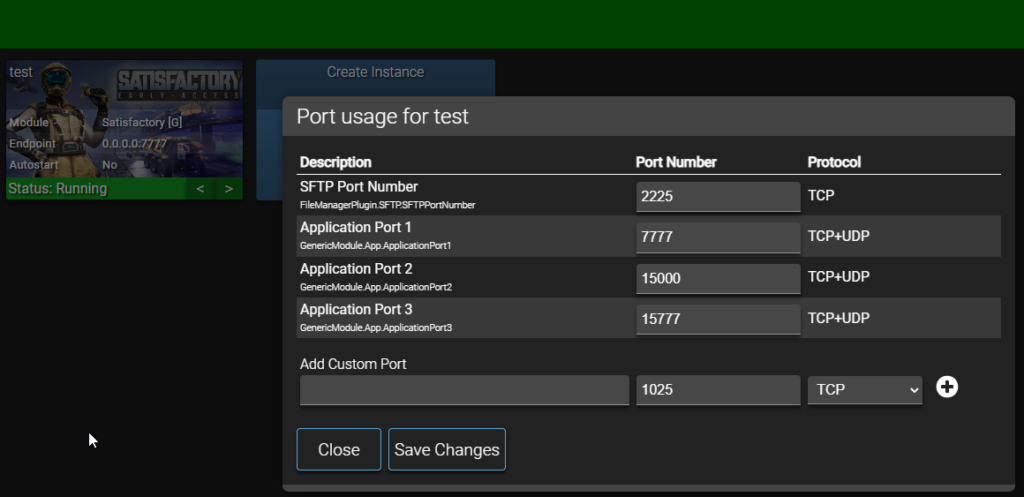
As an extra in case you are using the app AMP from CubeCoders to manage your Satisfactory Server, you can easily edit your ports and changes.
Right click on your satisfactory instance and select «Edit Port Bindings» you will end up with something like the pictures below:
You must replace those ports for the ones playit gave you, you can get a better idea with the picture below:
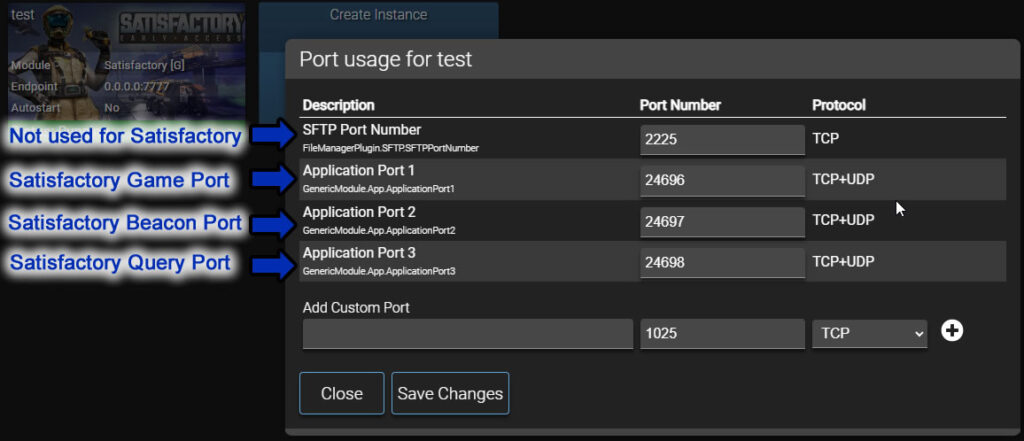
Go Ahead and Save your changes. That would be it.


